Hospitable (formerly Smartbnb) Message Setup Guide
We will refer to this page to set up your guest message flow with Hospitable
Table of Contents
Learn about Autohost Process Flow
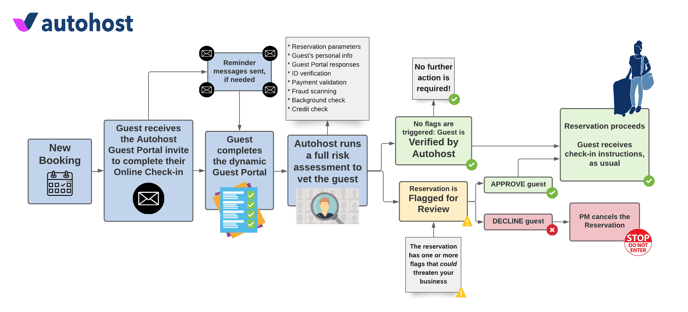
To learn more about the process flow, refer to this help center article.
Learn about Autohost Stargate
Autohost Stargate is an email relay system.
Its purpose is to act as a gatekeeper in your online communications with guests, which allows Autohost's Screening AI to complete risk analysis on the guest. The results of this analysis will determine whether or not to release the check-in instructions.
Stargate uses verification-dependent filters to release (or withhold) specific messages (i.e. check-in instructions or house manuals).
To learn more about Stargate, refer to this help center article.
This is your current message flow:
Hospitable > Guest
Your pre-check-in messages to guests are set up and sent by Hospitable.
This is your new message flow:
Hospitable > Autohost > Guest
Your pre-check-in messages to guests will first pass through Autohost Stargate, to ensure the right conditions are met before the messages are released to the guest.
Set up your Message Templates
First, let's create our messages by following the instructions below. Label the messages, as follows:
1. AH Booking Confirmation
Activation Steps:
- On Hospitable, go to Guest experience > Messaging rules.
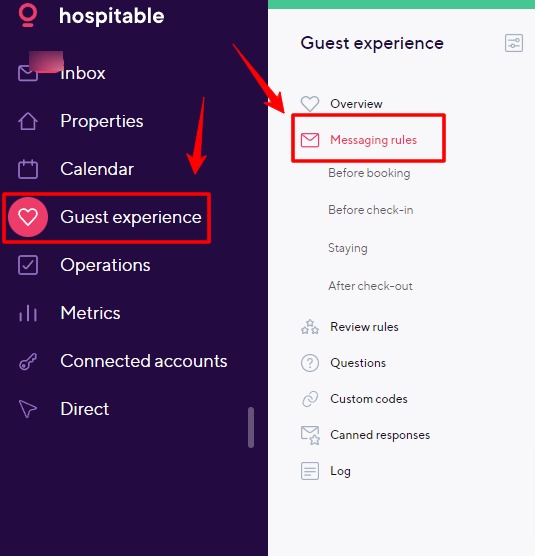
- Click + Add new.

- Navigate to Schedule a message, and select "After a new reservation".
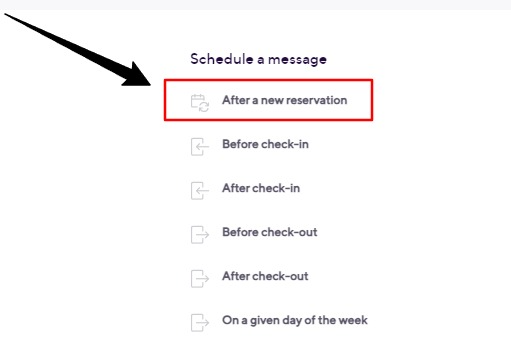
- Proceed to fill out the message template, as follows:
Message:
Hi %guest_first_name%,
Thank you for booking a stay with us.
Here are your reservation details:
%listing_name%
Check-in: %check_in%
Check-out: %check_out%
To ensure the safety of our guests, staff, properties, and community; we require all guests to complete our secure guest verification portal as noted in our listing description.
Please complete the guest verification portal linked below ahead of your check-in date, to ensure your check-in instructions are sent ahead of your arrival.
https://verifyhub.org/_%reservationcode%_
We look forward to hosting you!
Thanks,
%host_first_name%
-1.jpg)
Timing:
1 minute

Under Scope, select:
your desired platforms.
your desired hosts.
your desired properties.
.jpg)
Now, scroll to the top, and review for spelling and error. Continue to the next section.
2. AH Reminder 1 & 2
Activation Steps:
- On Autohost, go to Guest Portal > Messages.
- Review the message copy for the following Reminders to confirm it reflects your company language and branding:
- Reminder 1
- Reminder 2
Here's what Reminder 1 should look like:
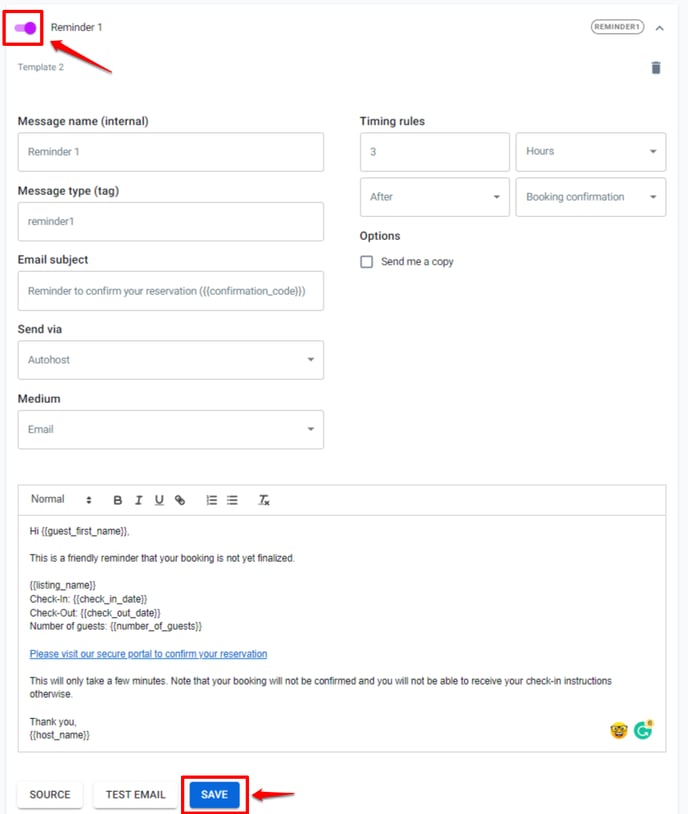
Here's what Reminder 2 should look like:

3. AH Check-In Instructions
Depending on your guest check-in process, you can choose to set up your Check-In Instructions message in one of two ways:
Option 1: Set up the message on Hospitable
Activation Steps:
- On Hospitable, go to Guest experience > Messaging rules.

- Click + Add new.

- Select Before check-in.
.jpg)
- Proceed to fill out the message template, as follows:
Message:
Hi %guest_first_name%,
Thank you for verifying your reservation. We look forward to hosting you!
Here are your check-in details:
[INSERT CHECK-IN DETAILS HERE]
Thanks,
%host_first_name%
.jpg)
Under Settings, select this:
Require guest verification
.jpg)
Timing:
24 hours before check-in date
.jpg)
Under Scope, select:
your desired platforms.
your desired hosts.
your desired properties.
.jpg)
Now, scroll to the top, and review for spelling and error.
Option 2: Set up the message on Autohost
Activation Steps:
-
- Go to Guest Portal > Messages.
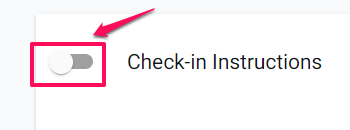
- Click on Check-in Instructions. Review and edit message copy according to your company language, tone, and branding.
- Once edited, click on the toggle to turn it 'on' (see image below).
Note:
- If you choose to enable the check-in instructions directly in Autohost, please remember to disable them in Hospitable.
- If your Guest Portal is hosted on a white-labelled URL, be sure to insert it in place of the generic link (https://verifyhub.org). Contact your Autohost Account Manager for information.
- Each message sent through Stargate must have an #AHP# code snippet.
- Each code snippet must be unique. If two messages have identical code snippets, Stargate will be forced to ignore one of them.
- A message can have only one #AHP# code snippet. If you need to send multiple
messages, you may create separate messages, and add a new code snippet. - The #AHP# code snippet must be the last line of text.
What does it mean to be verified by Autohost?
If a reservation has been verified, that means it showed a very low-risk score and successfully passed all of Autohost's verifications, validations and smart tests. For more about our verification statuses, check out this help center article.